This tutorial explains how to set up the clean WordPress theme – Blankie – onto your server and include all demo data that you can see on our demo server. Please follow all the steps explained here to install the theme with all demo data properly.
Table of Contents
- Install and Activate Theme
- Install and Activate Plugins
- Import WordPress XML File
- Create Menu and Menu Items
- Import Widgets and Select Visibility
- Upload Images for Plugins
- Configure Home Page
Introduction
If you need the theme only and don’t want to copy our demo data onto your server, you don’t need to follow this tutorial. There are 2 ZIP archives that you should download from our site before we start:
- Blankie – WordPress Theme (hot-blankie-wp-theme.zip)
- Blankie – Demo Data (hot-blankie-wp-demo.zip)
1. Install and Activate Theme
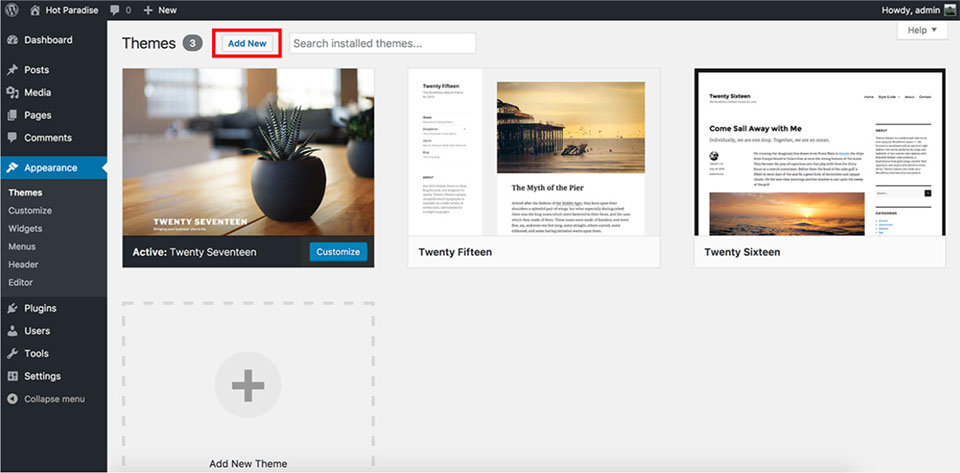
From your WordPress Dashboard, go to Appearance > Themes. Click Add New button.
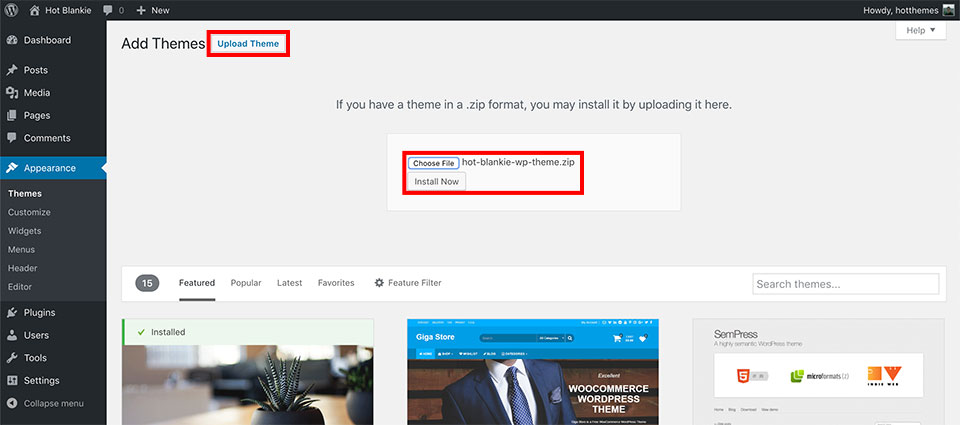
Click Upload Theme button. New dialog will ask you to upload theme in .zip format. So, click Choose File button and select file hot-blankie-wp-theme.zip from your computer. Finally, click the Install Now button.
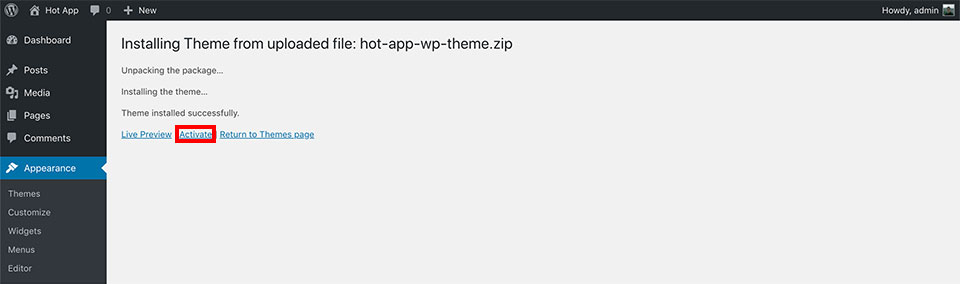
You should receive the message “Theme installed successfully.” and the next step is to activate it. Click Activate link to activate the theme.
2. Install and Activate Plugins
You are ready to start the of required and recommended plugins after theme activation. A yellow message box will appear after theme activation. Click Begin installing plugins link from this message box.

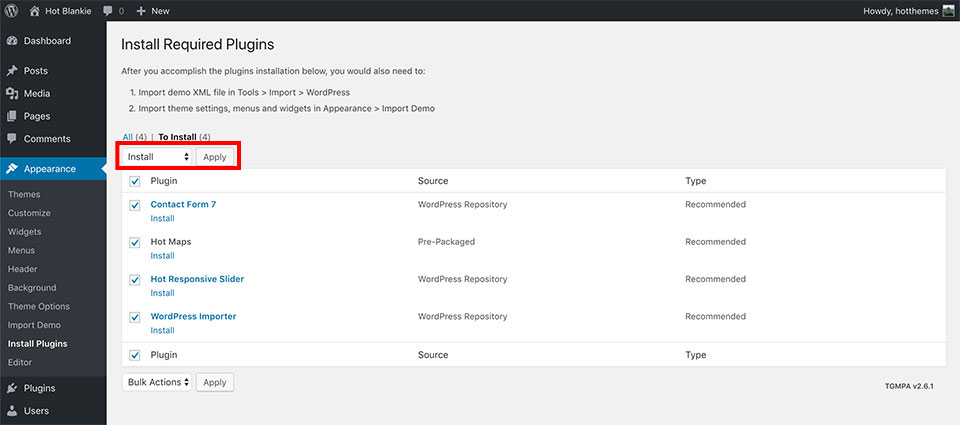
A list of all required and recommended plugins for the theme will be displayed. The first step is to install plugins. Select all plugins (you can skip some of the Recommended plugins) and from the Bulk Actions menu, select Install option. Click Apply button. Please wait until all the plugins are downloaded and installed.
Install only the plugins you need.
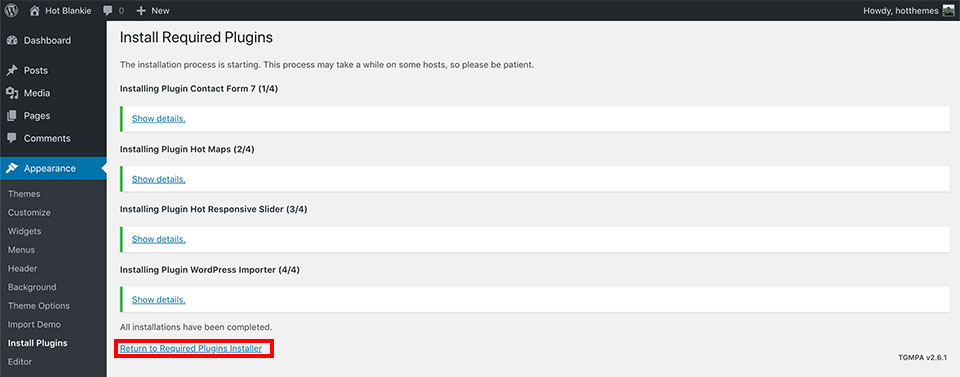
When it’s done, you can click Return to Required Plugins Installer link.
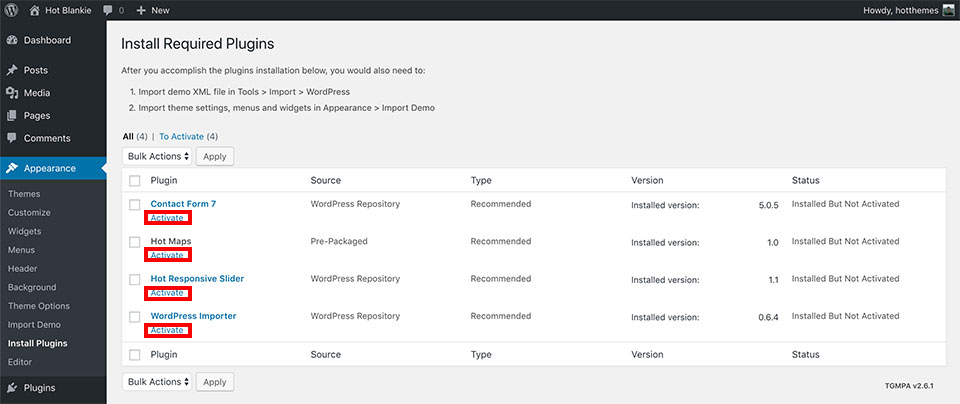
You will see the list of plugins again. It’s time to activate them now. It’s recommended to activate plugins one by one because some plugins require post-activation actions. Click Activate link of the first plugin and wait for confirmation message. The activated plugin will be removed from the list. This means it’s successfully installed and activated. You can click Activate link of the next plugin and so on until you activate them all.
3. Import WordPress XML File
Make sure you installed and activated WordPress Importer plugin in the step 2.
Extract the archive hot-blankie-wp-demo.zip you downloaded from our site and locate file demo-data.xml
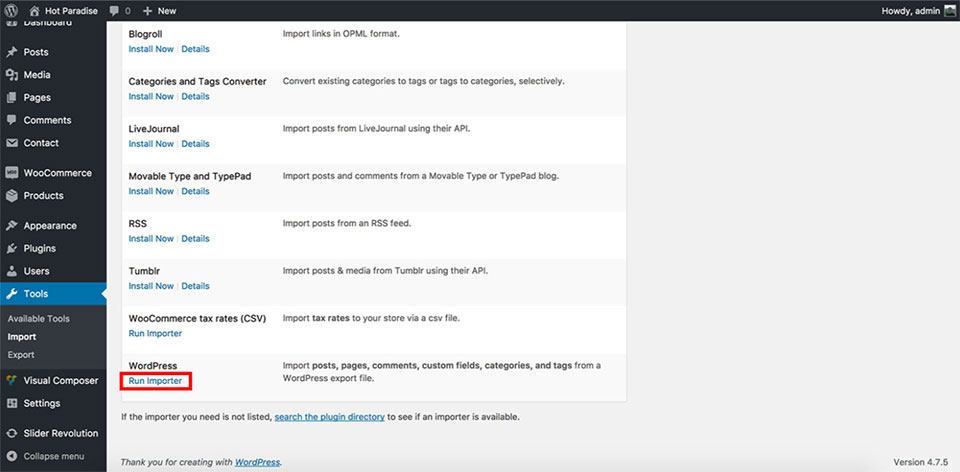
From your WordPress Dashboard, go to Tools > Import. You will see a list of various importers. Locate one that’s marked with WordPress and click Run Importer link below it.
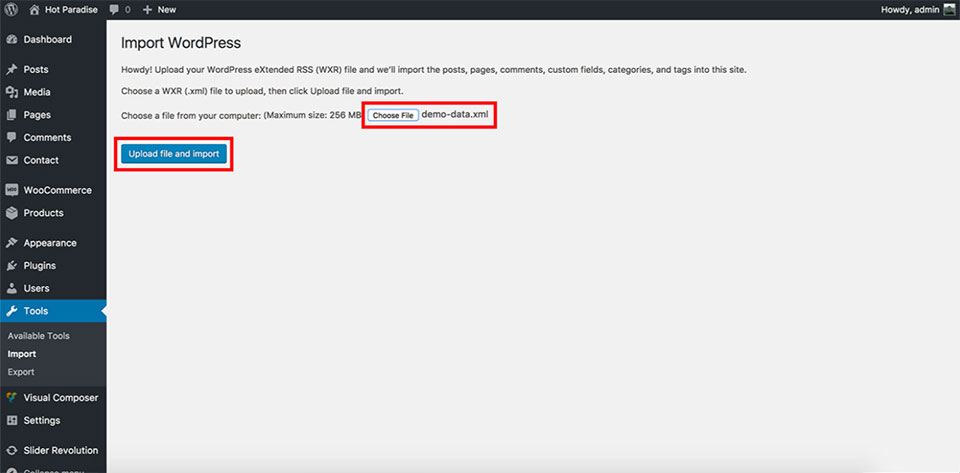
You will see a page with heading “Import WordPress”. Click Choose File button and select demo-data.xml file from your computer. Click Upload file and import button.
On the next screen, you will see that the author of all demo data is set to milos. You should assign this demo data to one of your WordPress users. So, either select an existing user from the drop-down menu or create a new user by entering its username.
Under “Import Attachments” heading, make sure you checked Download and import file attachments option. Finally, click Submit button.

Please wait until the import procedure is finished. It can take some time because images will be downloaded from our server during the import. How much time it will take it depends on your internet connection speed (if you are installing on the local server) or of your server’s bandwidth (if you are installing on the live server).
When the import procedure is finished, you will get a message “All done. Have fun!”.

You can delete Hello World! post that’s created when you installed WordPress.
4. Check Menus and Menu Items
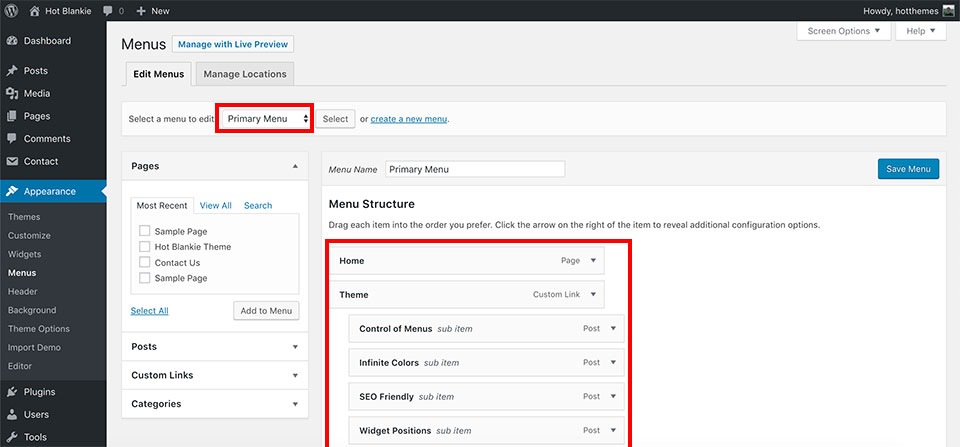
Now, when we have the content imported, the menus and menu items should be imported as well. To check this, from WordPress Dashboard, go to Appearance > Menus.
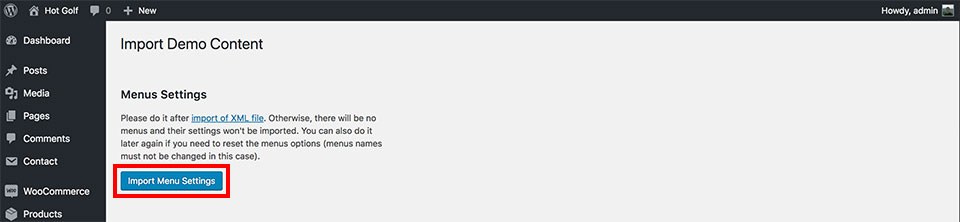
Now, you can go to Appearance > Import Demo. On this page, click Import Menu Settings button and confirm.
The last step is to open the Customizer once. From your WordPress Dashboard, go to Appearance > Customize. It will open the Customizer and register all default options into the database. You can close it as soon as it’s opened.
5. Import Widgets and Select Visibility
Before importing the widgets, you should delete all existing widgets. Go to Appearance > Widgets. Delete all widgets from all widget positions. To do this, first open a widget position (i.e. Right Column, Left Column, Widget1, etc.). If you find any widgets, open the widget settings and click the red Delete button to delete each widget.
From your WordPress Dashboard, go to Appearance > Import Demo. On this page, click Import Widgets button once and confirm. All widgets will be imported altogether with their settings.

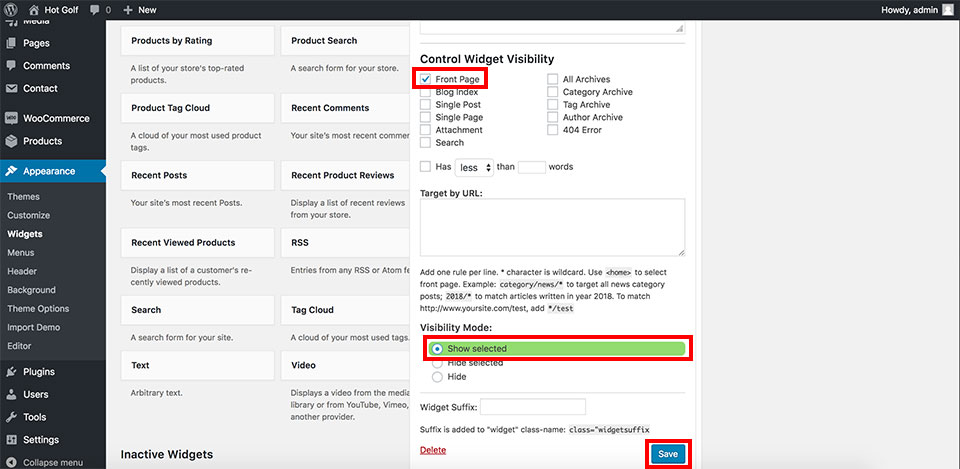
When you import the widgets, their visibility is not imported, so all widgets are visible on all pages. You can change this if you want. From your Dashboard, go to Appearance > Widgets. In an example, you can publish some of the widgets on the home page only. To set this, select Front Page and Show selected options as it’s shown on the image:
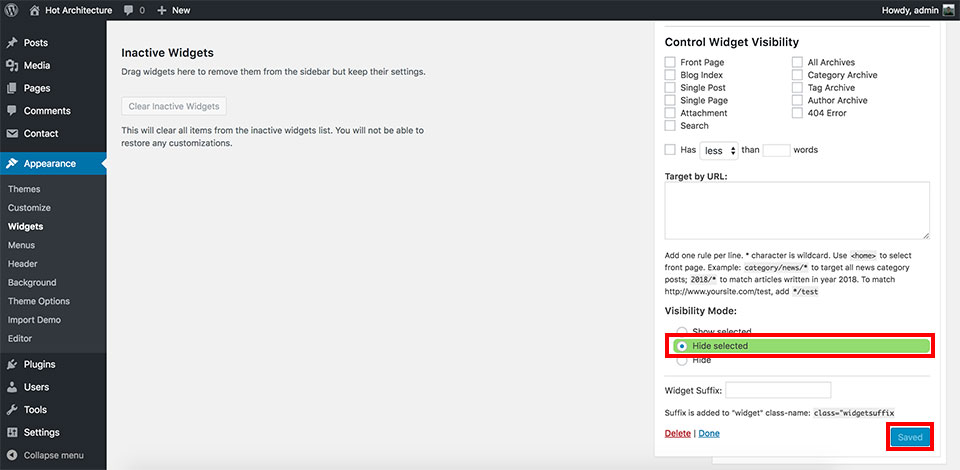
On the other hand, if you want some widgets to be visible on all pages, you can select only option Hide selected:
There are many other combinations you can use to determine where to publish certain widgets.
6. Upload Images for Plugins
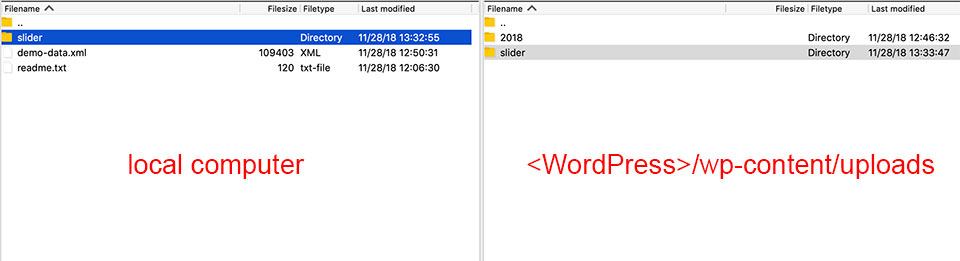
If you are installed and activated Hot Responsive Slider plugin, you will need to upload demo images by FTP. Unzip archive hot-blankie-wp-demo.zip that you downloaded from our site. You should have this folder with images:
- slider
Using your FTP client, upload these folders to /wp-content/uploads folder of your WordPress.
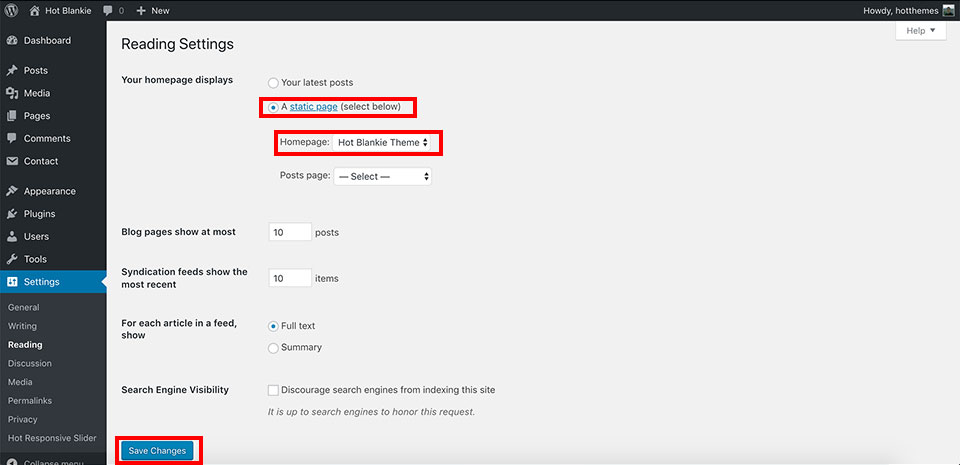
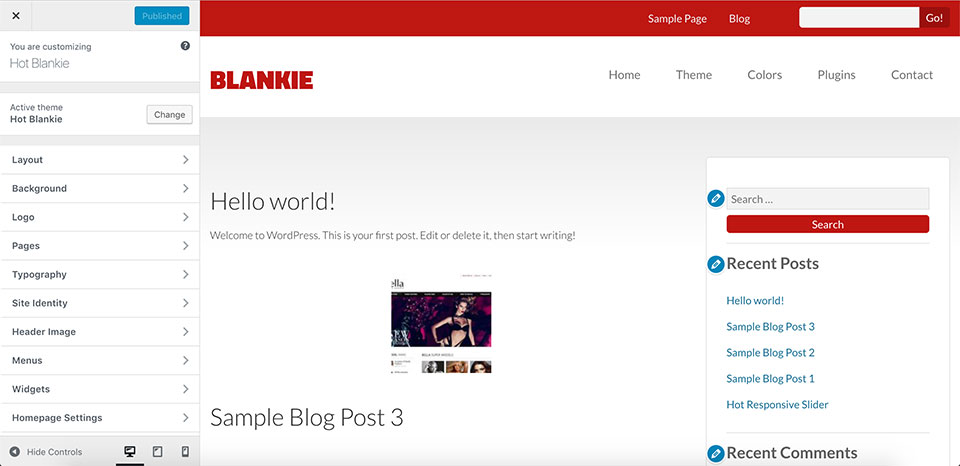
7. Configure Home Page
On our demo, for the home page, we selected the page “Home Page”. You can do the same for your installation if you go to Settings > Reading, select A static page option and select the Hot Blankie Theme from the Homepage list.